Beats Solo 3 Instruction Manual: A Comprehensive Guide

Welcome! This guide provides a comprehensive walkthrough for your Beats Solo 3 Wireless headphones. We will cover everything from initial setup and pairing to troubleshooting common issues. Use this manual to get the most from your headphones.

The Beats Solo 3 Wireless headphones are designed for a premium listening experience, offering both convenience and high-quality audio. Known for their sleek design and robust wireless capabilities, these headphones provide a seamless connection to your devices via Bluetooth.
This guide will walk you through the essential aspects of using your Beats Solo 3, ensuring you can fully enjoy their features. We will cover everything from unboxing and initial setup to advanced functionalities like iCloud integration and troubleshooting. Whether you are an iOS or Android user, this manual will provide clear and concise instructions tailored to your device.
The Beats Solo 3 are more than just headphones; they are a lifestyle accessory. Their long-lasting battery ensures uninterrupted listening, while the on-ear controls offer easy management of music and calls. With a focus on user-friendliness, this guide aims to make your experience with the Beats Solo 3 as smooth and enjoyable as possible. From understanding the specifications to mastering the wireless controls, we’ve got you covered.

Unboxing and Initial Setup
Congratulations on your new Beats Solo 3 Wireless headphones! This section guides you through the unboxing process and initial setup to get you started quickly. Carefully open the box and verify that all the included accessories are present. You should find the Beats Solo 3 headphones, a carrying case, a micro-USB charging cable, and a Quick Start Guide.
Before you begin, inspect the headphones for any physical damage. Once you’ve confirmed everything is in good condition, proceed to charge your Beats Solo 3. Use the provided micro-USB cable to connect the headphones to a power source. Allow them to charge fully before the first use to maximize battery life. While charging, familiarize yourself with the button layout and the overall design of the headphones.
After charging, you’re ready to pair your Beats Solo 3 with your device. For iOS users, the process is incredibly simple. Just power on the headphones near your unlocked iPhone, and follow the on-screen instructions. For Android and other devices, you’ll need to manually connect via Bluetooth settings. Let’s dive into the specific steps for each platform in the following sections.
Powering On/Off and Pairing
Understanding how to power your Beats Solo 3 on and off, as well as pairing them with your devices, is fundamental to their use. To power on your Beats Solo 3, simply press the power button located on the right earcup for one second. You’ll hear a brief tone and see the LED indicator light up, signifying that the headphones are on. To power them off, press and hold the same power button until the LED turns off and you hear a descending tone.
Pairing your Beats Solo 3 with a device is equally straightforward. After powering them on, if they haven’t been paired before, they will automatically enter pairing mode. On your device, navigate to the Bluetooth settings and search for available devices. You should see “Beats Solo 3” appear in the list. Select it to initiate the pairing process. If prompted, enter the passcode “0000” (though this is usually not required). Once paired, you’ll hear a confirmation tone, and the LED indicator will become solid.
For subsequent connections, your Beats Solo 3 will automatically connect to the last paired device when powered on, provided that Bluetooth is enabled on the device and the headphones are within range. If you want to pair with a different device, you may need to manually disconnect from the current device first.

Connecting to iOS Devices
Connecting your Beats Solo 3 to an iOS device is streamlined thanks to the Apple W1 chip (or later H1) integration. This chip simplifies the pairing process, making it incredibly user-friendly. Begin by ensuring that Bluetooth is enabled on your iPhone or iPad. Then, power on your Beats Solo 3 headphones and hold them near your unlocked iOS device. A setup card will automatically appear on your device’s screen.
This card will display an image of your Beats Solo 3 and prompt you to connect. Simply tap the “Connect” button on the screen. Your iOS device will handle the rest of the pairing process automatically. You’ll see a confirmation message once the connection is established. This initial pairing also links your Beats Solo 3 to your iCloud account, allowing them to seamlessly connect to other Apple devices associated with the same account.
To verify the connection, check the Bluetooth settings on your iOS device. You should see “Beats Solo 3” listed under the connected devices. You can also access the Control Center by swiping down from the top-right corner of your screen and selecting “Beats Solo 3” to manage the audio output. The battery level of your headphones will also be displayed on your iOS device for your convenience.
Connecting to Android Devices
Connecting your Beats Solo 3 to an Android device requires a slightly different approach compared to iOS, but it is still a straightforward process. First, ensure that Bluetooth is enabled on your Android device. Next, power on your Beats Solo 3 headphones. The headphones will automatically enter pairing mode, indicated by a flashing LED light.
On your Android device, navigate to the Bluetooth settings. This is typically found within the “Connections” or “Wireless & Networks” section of your settings menu. Tap on “Pair new device” or a similar option to initiate a Bluetooth scan. Your Beats Solo 3 should appear in the list of available devices. Select “Beats Solo 3” from the list to begin the pairing process.

Your Android device may prompt you to confirm the pairing with a passcode. If so, enter “0000” or confirm the pairing request. Once the pairing is complete, your Android device will indicate that the Beats Solo 3 are connected. You can now enjoy audio from your Android device through your headphones. To disconnect, simply turn off Bluetooth on your Android device or power off the Beats Solo 3. Remember to unpair the device from the Bluetooth settings if you don’t plan to use the headphones with that device in the future.
Wireless Controls: Music and Calls
The Beats Solo 3 Wireless headphones offer intuitive controls for managing both music playback and phone calls, all conveniently located on the ear cup. Understanding these controls enhances your listening experience and allows for seamless interaction without reaching for your connected device.
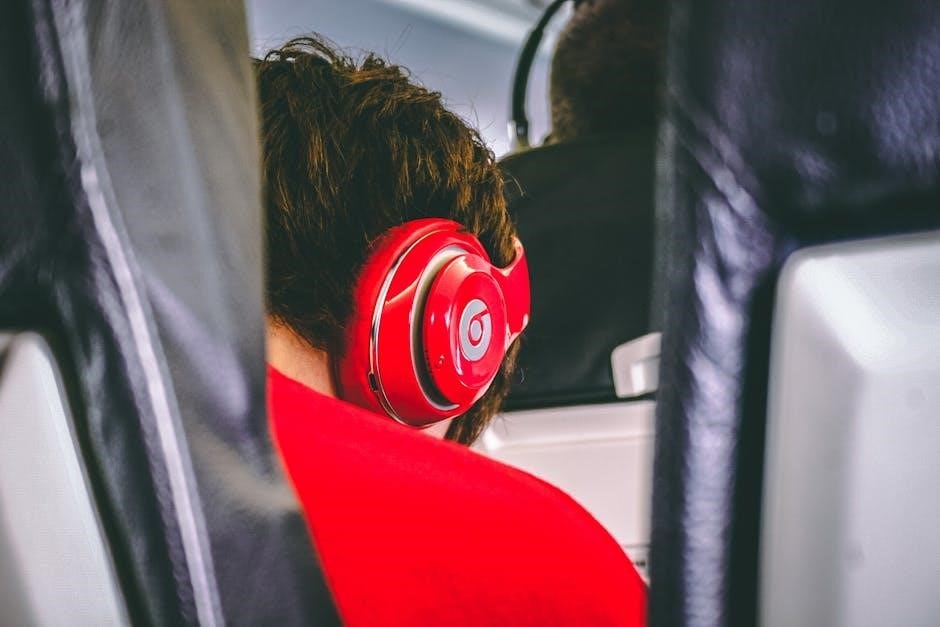
For music playback, the “b” button, usually located on the right ear cup, serves as the primary control. A single press of the “b” button will play or pause the current track. To skip to the next track, press the “b” button twice in quick succession. To return to the previous track, press the “b” button three times quickly. These simple commands provide full control over your music library without needing to access your phone or tablet.
When a call comes in, the same “b” button is used to manage the call. A single press of the “b” button will answer an incoming call. To end the call, simply press the “b” button again. If you wish to reject an incoming call, press and hold the “b” button for a few seconds. The built-in microphone allows for clear communication during calls, and the ear cup controls make managing calls easy and efficient. These controls make your audio experience seamless.
Volume Adjustment
Adjusting the volume on your Beats Solo 3 Wireless headphones is straightforward and intuitive, allowing you to customize your listening experience with ease. The volume controls are conveniently located on the ear cup, providing quick access without needing to reach for your connected device. To increase the volume, locate the button positioned above the “b” button and press it. Each press will incrementally raise the volume level, allowing you to fine-tune the sound to your preference.
Conversely, to decrease the volume, find the button situated below the “b” button and press it. Similar to increasing the volume, each press will incrementally lower the sound level. This granular control ensures that you can achieve the perfect volume, whether you’re in a quiet environment or a noisy one.
It’s important to note that the volume adjustment on the Beats Solo 3 Wireless headphones works in conjunction with the volume control on your connected device. Ensure that the volume on your smartphone, tablet, or computer is also set to an appropriate level to achieve the desired overall volume. If you’re experiencing low volume, check both the headphone volume and the device volume to ensure they are properly adjusted. By understanding and utilizing these volume controls, you can enjoy your music, podcasts, and calls at the perfect sound level, enhancing your overall listening pleasure.
Charging the Beats Solo 3
Keeping your Beats Solo 3 charged ensures uninterrupted enjoyment of your favorite audio. The Beats Solo 3 utilizes a micro-USB port for charging, a common and convenient standard. To charge your headphones, locate the micro-USB port on the bottom of one of the earcups. Then, using the included micro-USB cable, connect your Beats Solo 3 to a power source.

You can use a computer’s USB port, a wall adapter, or any other USB power source to charge your headphones. When connected to a power source, the LED indicator on the earcup will illuminate to indicate the charging status. A solid light typically signifies that the headphones are charging, while a change in color or the light turning off usually indicates that the headphones are fully charged.
The Beats Solo 3 are known for their impressive battery life, offering up to 40 hours of playback on a single charge. Additionally, they feature Fast Fuel technology, providing up to 3 hours of playback with just a 5-minute charge. This is particularly useful when you’re in a hurry and need a quick boost of power. To maximize the lifespan of your battery, it’s recommended to avoid leaving your Beats Solo 3 plugged in for extended periods after they are fully charged. Regularly charging your headphones will ensure they are always ready when you need them, providing a seamless and enjoyable listening experience.
Using with Other Apple Devices (iCloud Integration)
The Beats Solo 3 headphones seamlessly integrate with other Apple devices through iCloud, enhancing the user experience across your Apple ecosystem. Once you’ve paired your Beats Solo 3 with your iPhone, the connection information is automatically synced to your other Apple devices linked to the same iCloud account. This eliminates the need to manually pair the headphones with each device individually, providing a streamlined and convenient experience.
To take advantage of this feature, ensure that Bluetooth is enabled on your other Apple devices, such as your iPad, Mac, or Apple Watch. Select Beats Solo 3 in Control Center (iOS) or menu bar (macOS). Your Solo3 Wireless device will now work with your other iCloud-enabled devices. When you want to switch the audio output to your Beats Solo 3, simply select them from the Bluetooth settings or the audio output options on your chosen device. This seamless switching allows you to effortlessly move between listening on your iPhone while commuting and listening on your Mac while working, all without having to go through the pairing process each time.

iCloud integration also ensures that any custom settings or preferences you’ve configured for your Beats Solo 3 are synced across your devices, providing a consistent and personalized listening experience, regardless of which Apple device you’re using. This makes managing your audio devices easier and more intuitive, allowing you to focus on enjoying your music or podcasts.

Troubleshooting Common Issues
Even with their user-friendly design, you might encounter occasional issues with your Beats Solo 3 headphones. One common problem is the inability to pair with a device. First, ensure that Bluetooth is enabled on both your headphones and the device you’re trying to connect to. If the devices don’t connect, try turning both off and on again. Make sure that the headphones are in pairing mode by pressing the power button for 5 seconds until the LED indicator flashes.
Another common issue is sound distortion or low volume. Verify that the volume is turned up on both the headphones and the connected device. If the issue persists, try cleaning the headphone drivers with a soft, dry cloth to remove any debris that may be obstructing the sound. If you’re experiencing connectivity problems, ensure that you’re within the Bluetooth range of the device.
If your Beats Solo 3 won’t charge, check that the charging cable is securely connected to both the headphones and a power source. Try using a different charging cable and adapter to rule out any issues with the charging accessories. If none of these steps resolve the problem, resetting your Beats Solo 3 may be necessary. Refer to the resetting instructions in this manual for guidance.
Resetting the Beats Solo 3
Resetting your Beats Solo 3 can resolve various issues, such as pairing problems, sound distortion, or unresponsiveness. Before initiating a reset, it’s wise to unpair the headphones from all your devices to avoid potential conflicts during the reconnection process. Once unpaired, ensure that your Beats Solo 3 are powered on.
To perform a reset, press and hold both the power button and the volume down button simultaneously for 10 seconds. The LED indicator on the headphones will flash, indicating that the reset process has begun. Continue holding the buttons until the LED indicator flashes several times, signaling that the reset is complete. After the reset, your Beats Solo 3 will power off automatically.

To use your Beats Solo 3 again, you’ll need to re-pair them with your devices. Turn on the headphones and follow the pairing instructions outlined earlier in this manual, depending on whether you’re connecting to an iOS or Android device. Resetting your Beats Solo 3 restores them to their factory settings, so you may need to reconfigure any custom settings you had previously set up.
Specifications of Beats Solo 3
The Beats Solo 3 Wireless headphones boast a range of impressive specifications that contribute to their popularity. These headphones offer wireless connectivity via Bluetooth, ensuring seamless pairing with compatible devices. They are known for delivering a clear and balanced sound quality, enhancing the listening experience across various music genres.
A key feature is their long-lasting battery life, providing up to 40 hours of playback on a single charge. With Fast Fuel technology, a quick 5-minute charge gives you 3 hours of listening time. The on-ear design offers comfortable wear, while the foldable design enhances portability. They feature an Apple W1 chip for easy pairing and seamless switching between Apple devices.
The headphones include on-ear controls for managing music and calls, with volume adjustment buttons conveniently located. A built-in microphone enables clear call quality. Charging is facilitated via a micro-USB port. Available in various colors, the Beats Solo 3 combine functionality and style for an enhanced audio experience.
Safety and Warranty Information
To ensure safe usage and longevity of your Beats Solo 3 Wireless headphones, please adhere to the following safety guidelines. Avoid prolonged exposure to high volume levels, as this can cause hearing damage. Refrain from using the headphones while operating a vehicle or in situations where awareness of surrounding sounds is necessary for safety. Keep the headphones away from water and extreme temperatures to prevent damage.
The Beats Solo 3 Wireless headphones come with a limited warranty that covers manufacturing defects and malfunctions. The warranty period typically lasts for one year from the date of purchase. This warranty does not cover damage caused by accidents, misuse, or unauthorized repairs. To claim warranty service, provide your proof of purchase and a detailed description of the issue.
For warranty-related inquiries, contact Beats customer support through their official website or authorized service centers. Always follow the care instructions provided to maintain the headphones’ condition and validity of the warranty. Unauthorized modifications may void the warranty.